User Guide
Follow this step-by-step workflow to install, configure, and export high-quality icons for your Unity projects.
Installation
Section titled “Installation”Follow these steps to integrate Icon Generator correctly into your workflow:
-
Import the Icon Generator package into your Unity project.
-
Make sure all scripts and resources are inside
Assets/Icon Generator. -
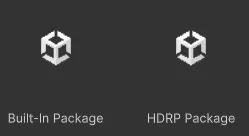
If your project uses the Built-in or HDRP render pipeline, also import the corresponding additional package located inside the plugin folder.
How to Create an Icon
Section titled “How to Create an Icon”Follow this complete workflow to create and export your icon:
-
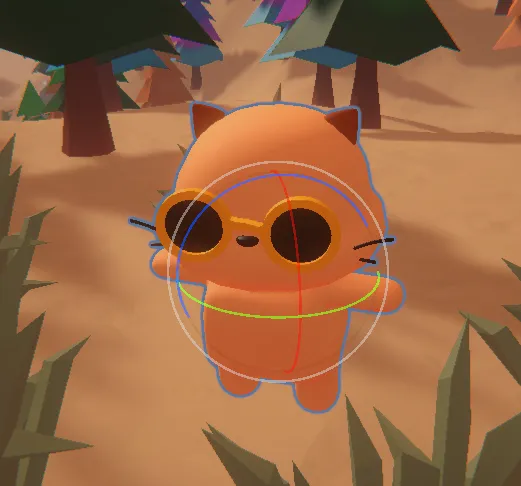
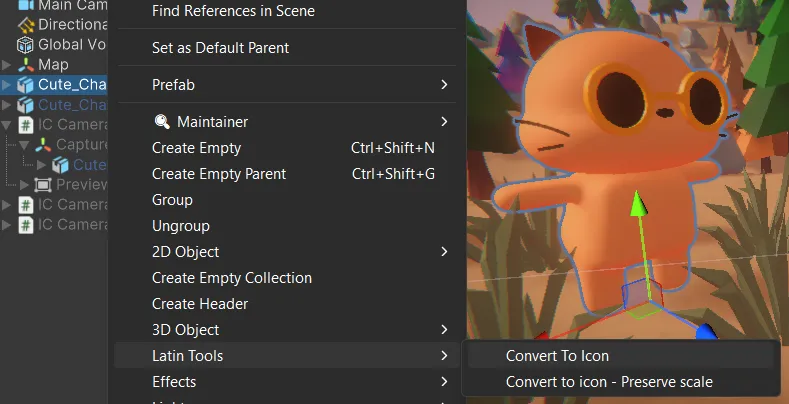
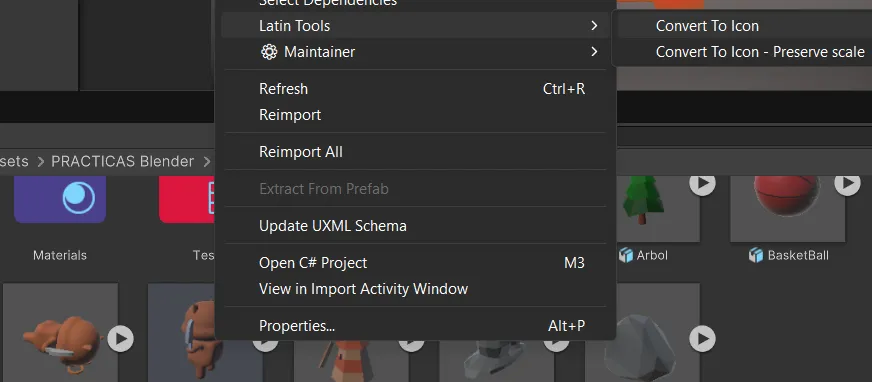
Select your model
In the Unity hierarchy, choose the 3D model you want to convert into an icon.
-
Open Icon Generator
Right-click the model and go to: Latin Tools > Convert To Icon .
-
Configure icon settings
The editor window will open so you can customize your icon.
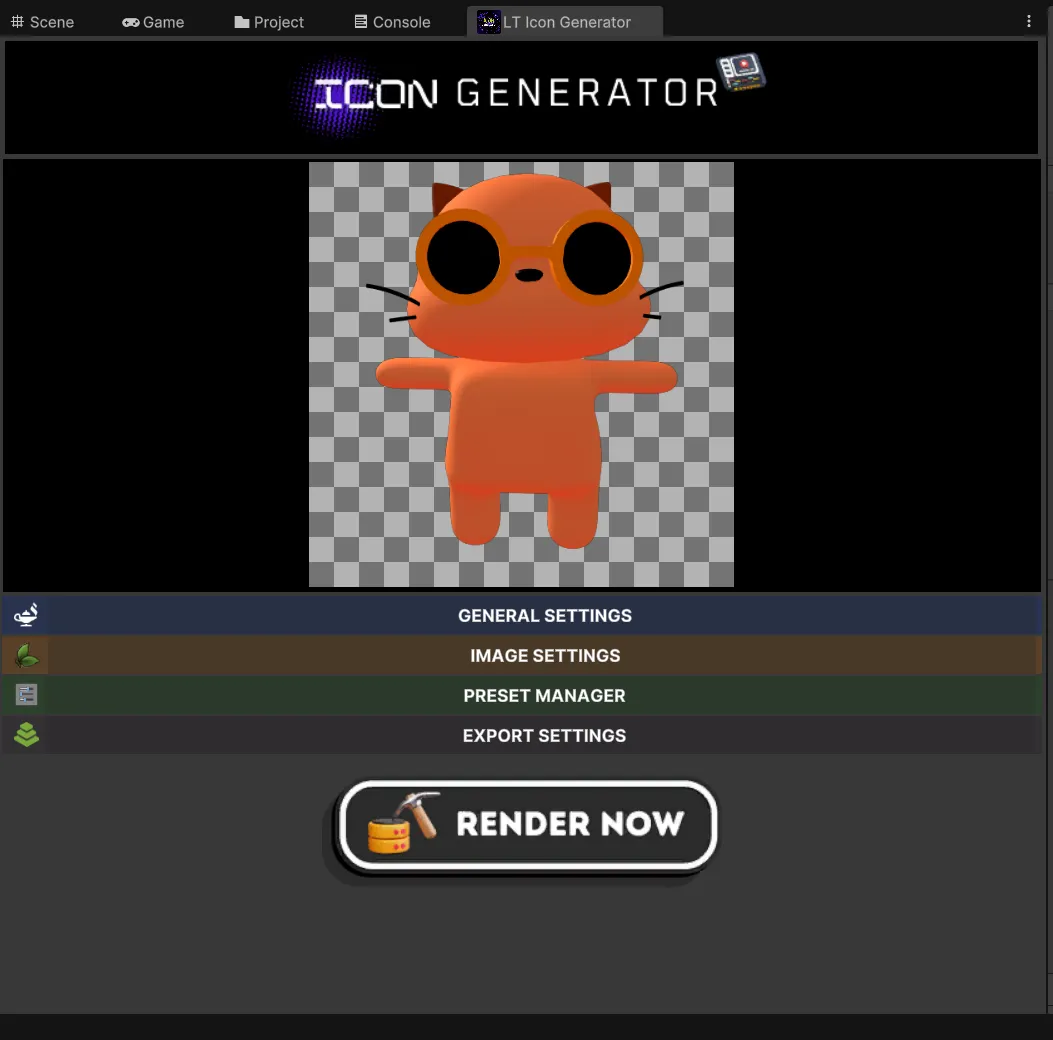
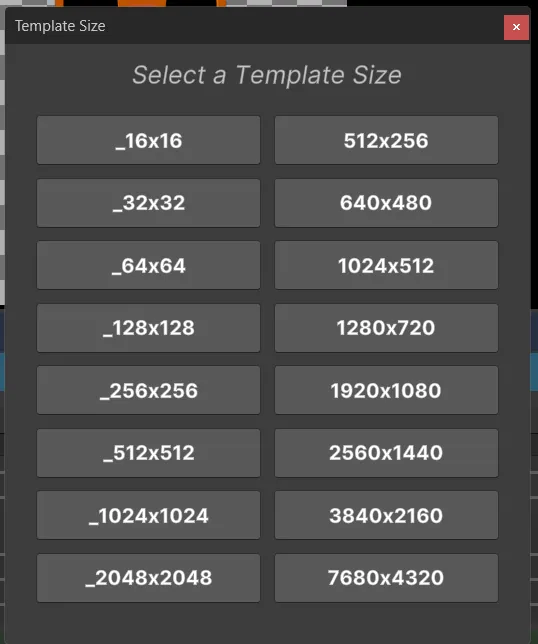
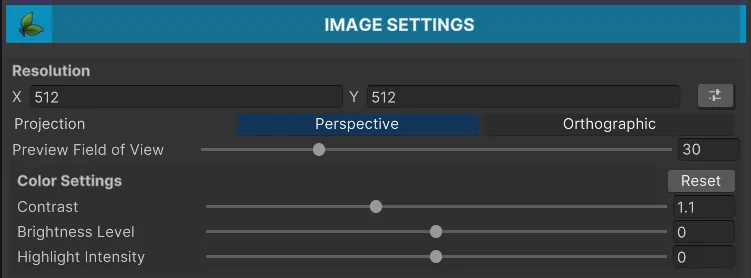
Preview Resolution
Set your desired icon resolution.

-
Review editing options
Use these sections to fine-tune the final result:
- General Settings
- Image Settings
-
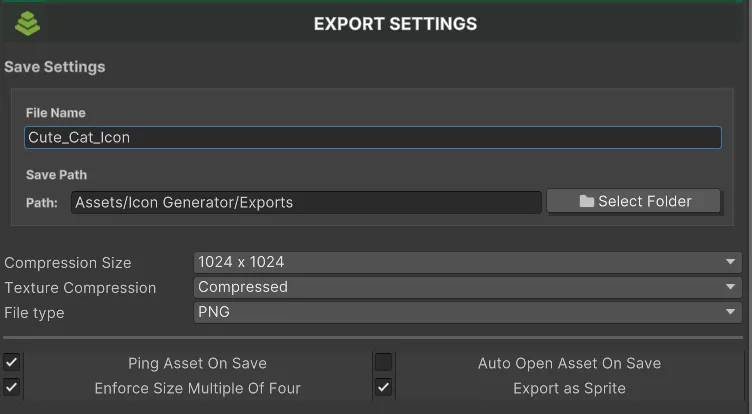
Define export name and path
Set the icon file name and the final path where you want to save it.
-
Export the icon
Click the Export button to finish and save the result.

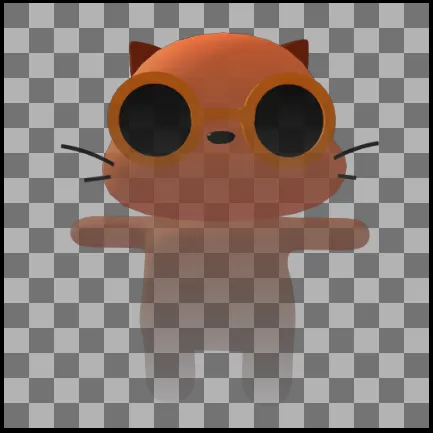
Final result
Section titled “Final result”After exporting successfully, you can validate the final texture directly inside your project.
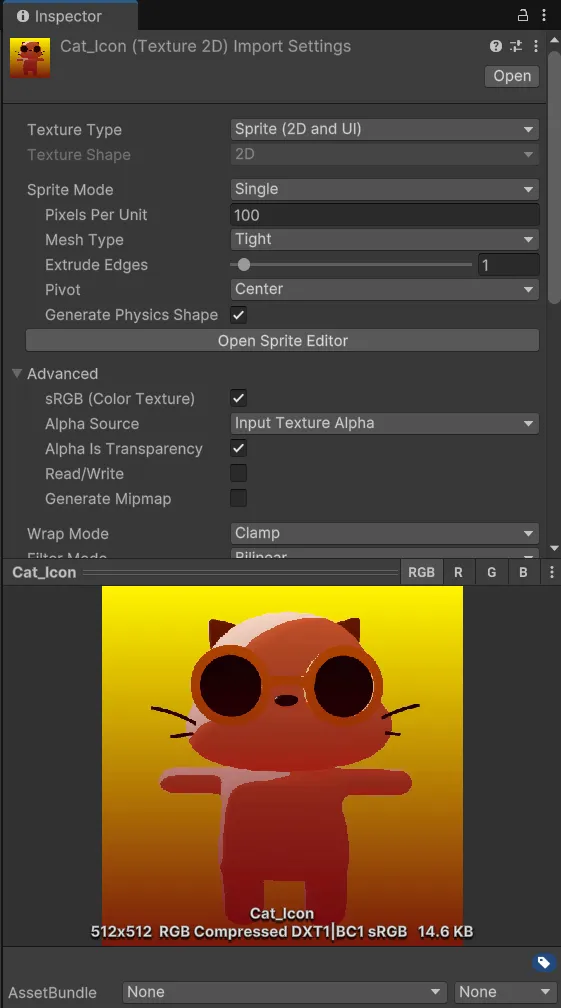


- Check sharpness and framing.
- Verify transparency according to the chosen format.
- Adjust compression or resolution if you need to optimize size.
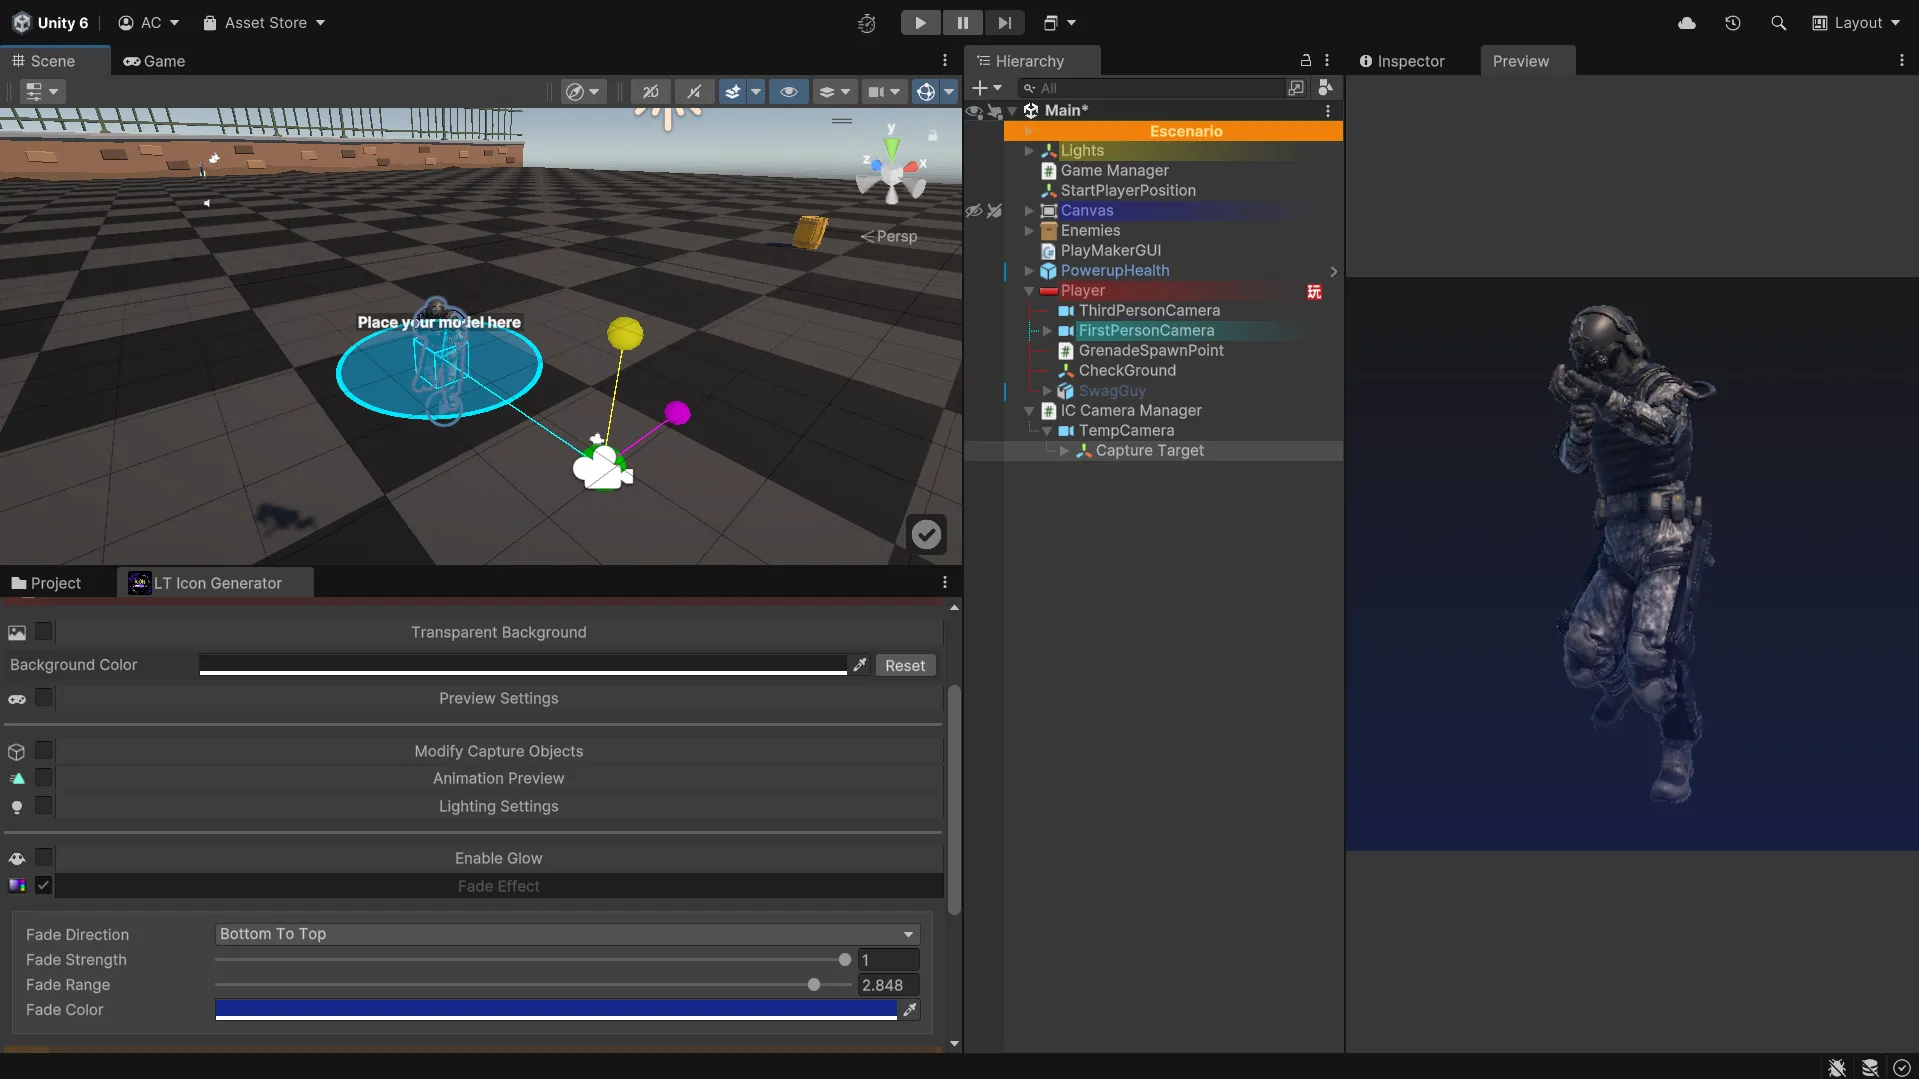
Preview Settings
Section titled “Preview Settings”
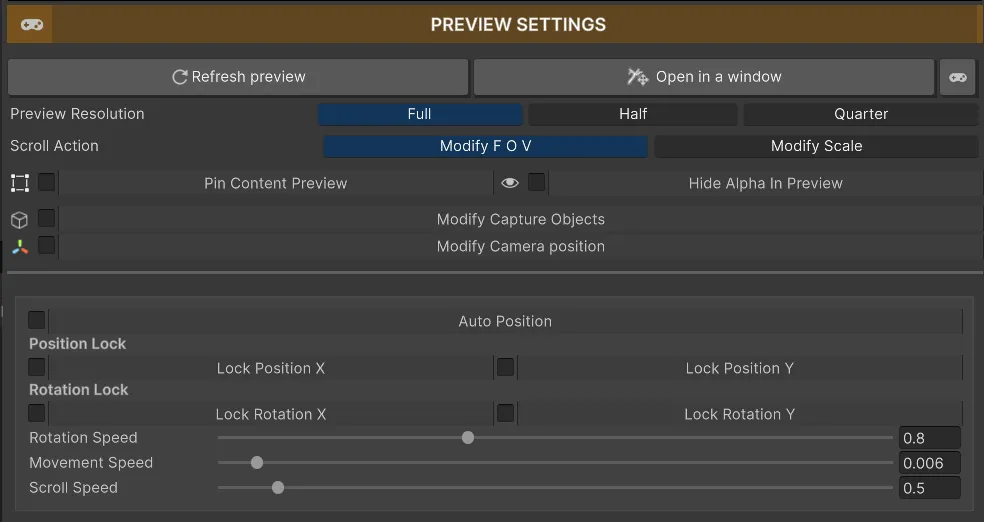
- Refresh Preview: use it if the preview does not update after changes.
- Open in Window: opens a separate window that updates in real time while keeping mouse events active.
- Game View: shows the preview inside the Unity editor, blocking mouse events to avoid interference while adjusting framing.
Pin Content Preview
Section titled “Pin Content Preview”- Keeps the preview always visible and hides the editor header to maximize workspace.
Hide Alpha in Preview
Section titled “Hide Alpha in Preview”- Hides the alpha channel in the preview so you can better evaluate contrast and icon readability without background distractions.
Preview Resolution
Section titled “Preview Resolution”- If you notice performance issues in the preview, lower this resolution to improve smoothness.
Scroll Action
Section titled “Scroll Action”- Defines what the mouse wheel controls: object FOV or scale.
Auto Position
Section titled “Auto Position”- Automatically centers the model for optimal alignment and visualization.
Position Lock and Rotation Lock
Section titled “Position Lock and Rotation Lock”- Lets you lock specific axes while dragging with right-click inside the preview.
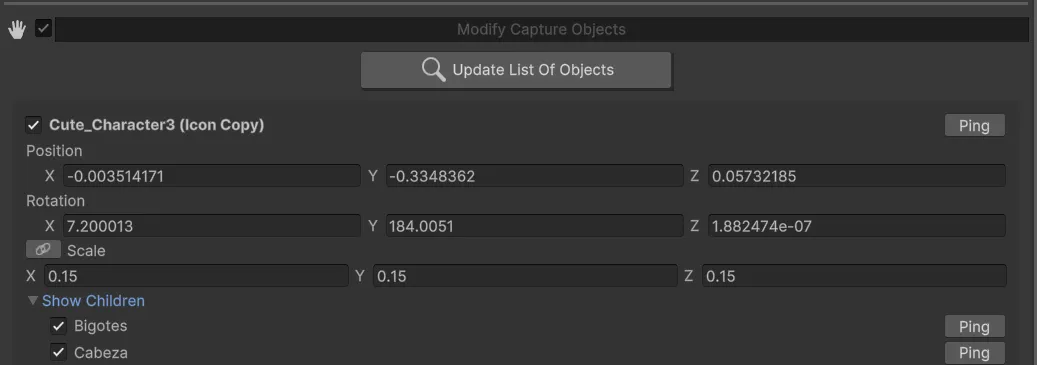
Modify Capture Objects
Section titled “Modify Capture Objects”- Enable, disable, and adjust model positions directly from the editor.
General Configuration
Section titled “General Configuration”Here are the most important options to control capture, preview, and output.
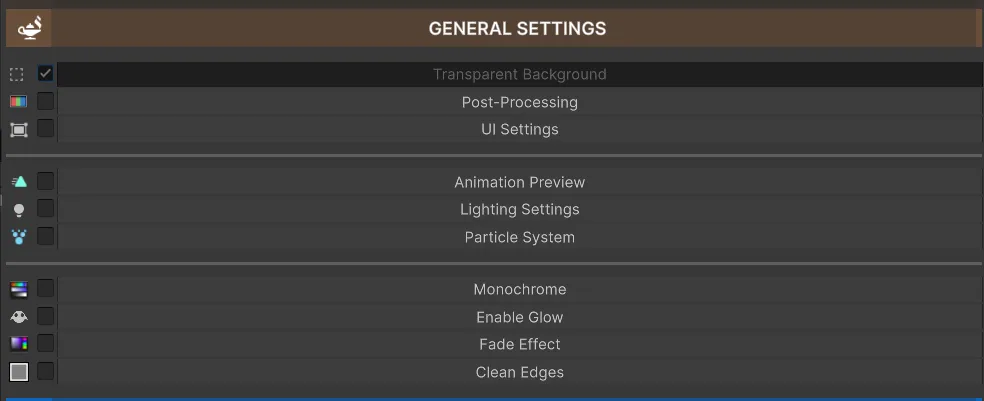
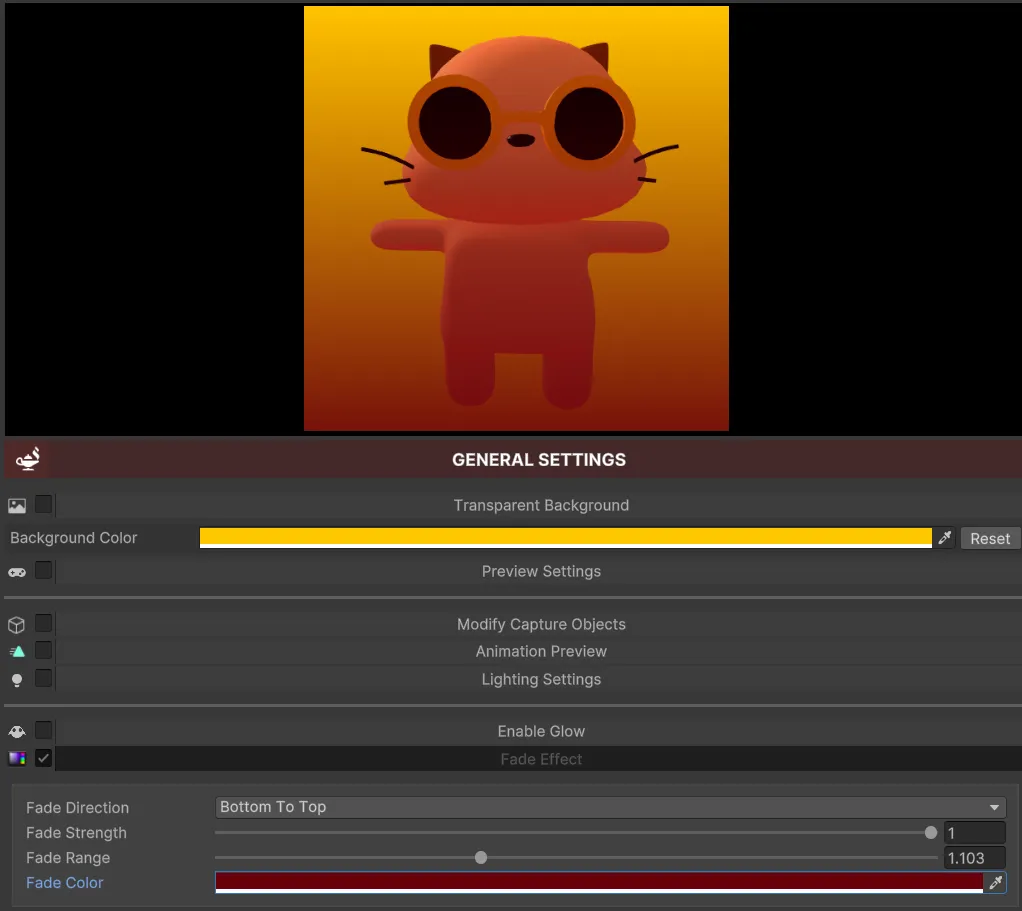
General Settings
Section titled “General Settings”Transparent Background
Section titled “Transparent Background”Enable this option to remove the background and generate a transparent icon.

- Show Only Capture Objects: if disabled, everything in front of the camera will be visible.
UI Manager
Section titled “UI Manager”- Plane Distance: sets the distance between camera and canvas to control canvas size on screen.

- All controls are intuitive and update in real time for faster visual adjustments.
Animation Preview
Section titled “Animation Preview”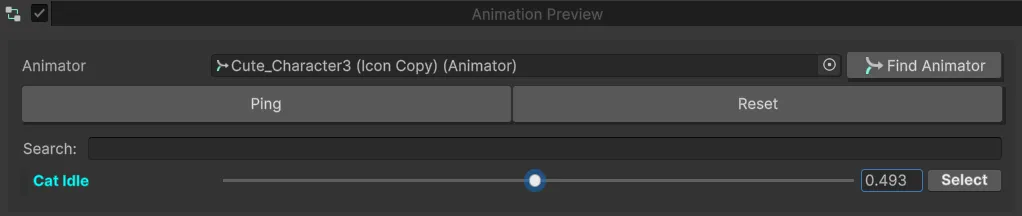
- Add your model’s Animator.
- Use Find Animator to locate it automatically in the hierarchy.
- Select animations to preview them in real time before exporting.
Visual Effects
Section titled “Visual Effects”Customize the visual readability of your icons with these effects.
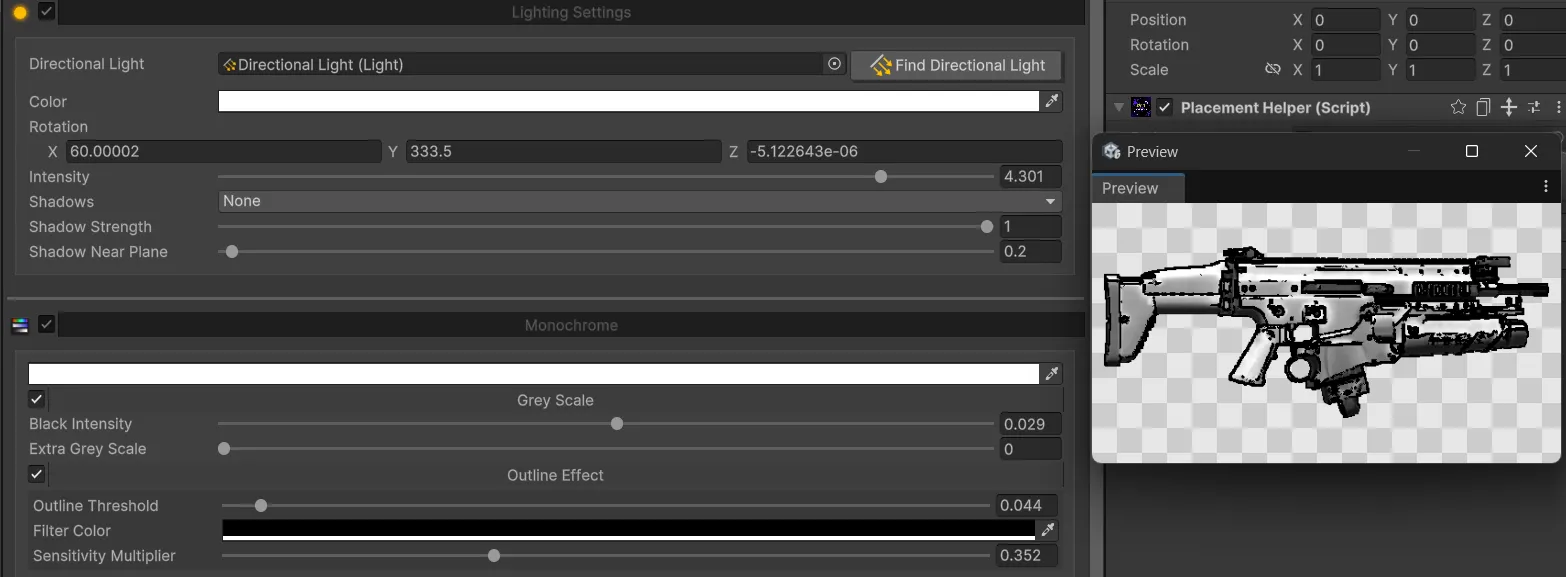
Monochrome
Section titled “Monochrome”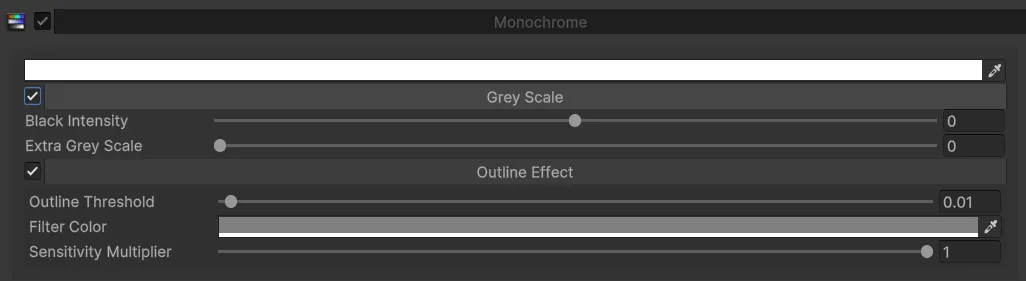
The Monochrome feature applies a grayscale view and is especially useful for:
- Evaluating contrast and readability without color distractions.
- Testing how assets look in a monochrome environment.
- Combining with Outline to reinforce silhouettes and edges.
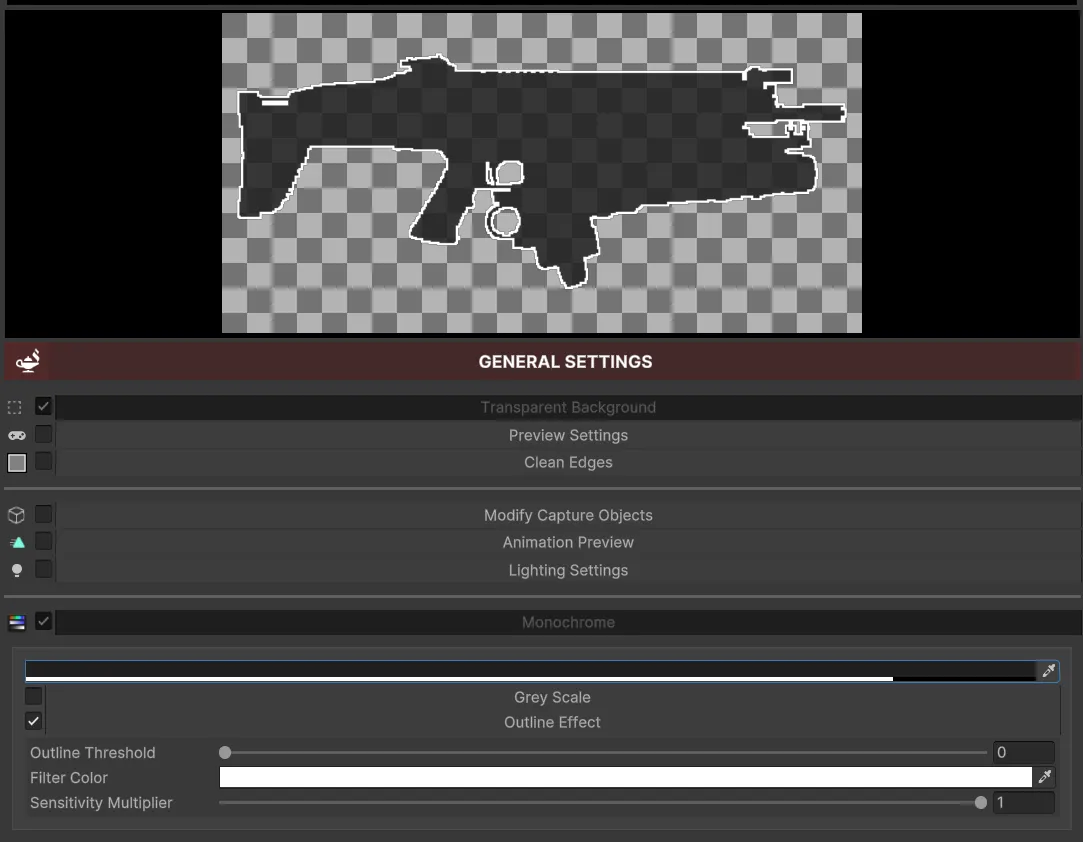
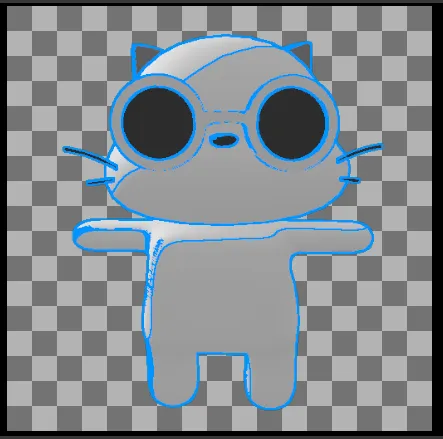
Outline Effect
Section titled “Outline Effect”- Improves shape readability in small icons.
- Ideal for assets with complex backgrounds or highly detailed elements.
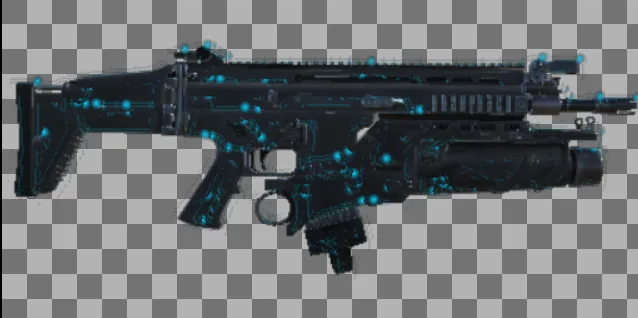
Glow (Experimental)
Section titled “Glow (Experimental)”- Experimental effect useful in specific cases, for example magical, rare, or legendary objects.
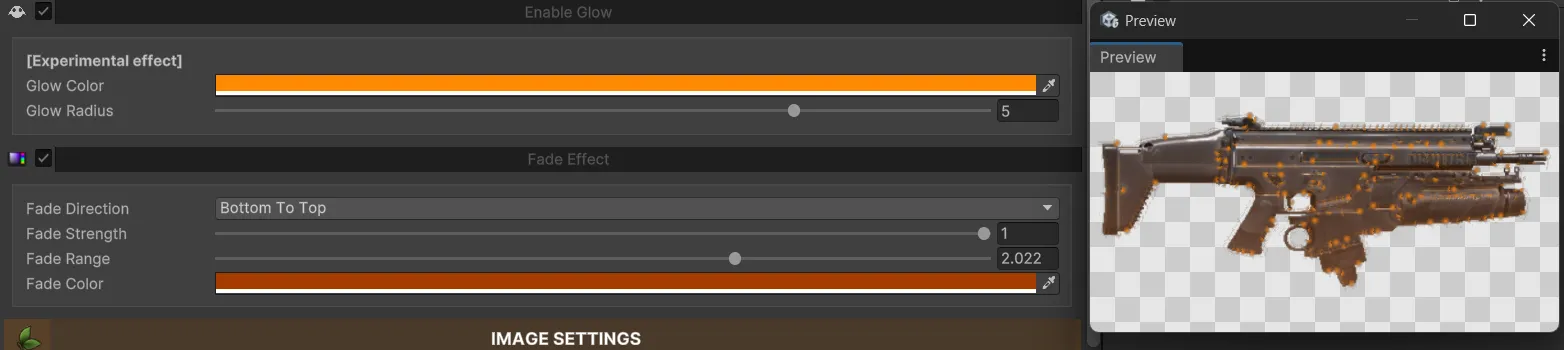
Fade Effect
Section titled “Fade Effect”- Control fade intensity and range to create icons with a softer or more ethereal style.

Preset Manager
Section titled “Preset Manager”The Preset Manager lets you save and reuse custom configurations.
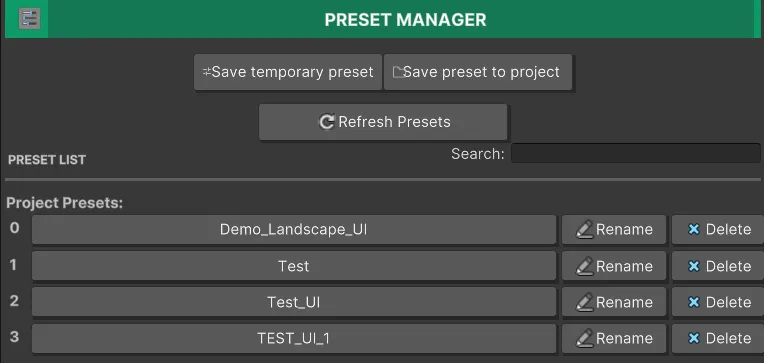
- Temporary presets: deleted when the editor window is closed.
- Project presets: saved in
.../Icon Generator/Presetsfor future use.
Export Settings
Section titled “Export Settings”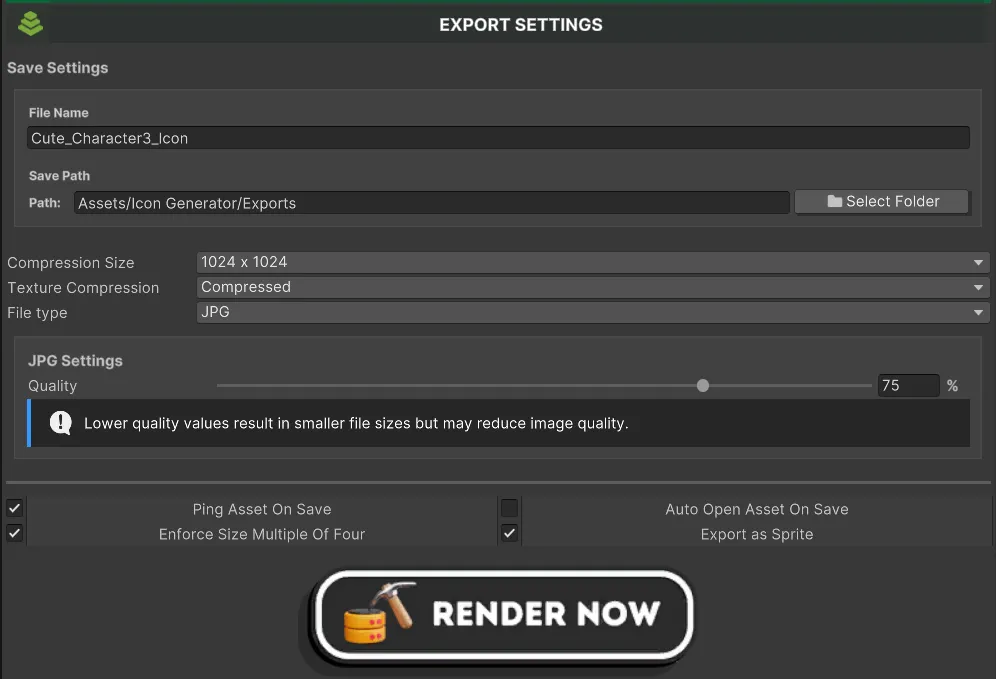
- Path: save icons inside or outside the project.
- Compression: choose compression level to reduce file size.
- Additional Export Options:
- Ping Asset On Save: locates the saved icon in Project.
- Auto Open Asset On Save: opens the image automatically after export.
- Enforce Size Multiple of Four: optimizes dimensions for textures.
- Use descriptive names for your presets.
- Experiment with different effect combinations depending on the asset type.
- Always review the exported result to validate quality and readability.
Troubleshooting
Section titled “Troubleshooting”- If the preview does not update, use Refresh Preview.
- If the editor feels slow, lower Preview Resolution while adjusting.
- If you need transparency, confirm the format is not JPG.
- If the final icon is not convincing, adjust framing, compression, and scale before exporting again.
Done! You can now build a consistent icon library for your entire project.